How do you know when a bearing needs to be replaced in a washing machine? In the process of washing the clothes, it begins to make noise, knock, creak. And over time, these unpleasant sounds will only increase. If the bearing is not replaced on time, then it will be much more difficult to do this. Also, if the bearing is not changed in a timely manner, the washing machine may completely break down, and will no longer be repairable. The best option, if a bearing breakage is detected, immediately replace it with a new one.
Replacing the bearing yourself will be very difficult and not at all quick. Therefore, before changing it, you need to decide whether you can do all the necessary work with your own hands? If such work is beyond your strength, then it is better to call a master. Replacing a bearing, including the cost of a new part, will cost you about a third of the cost of a new washing machine. Of course, there are different prices for household appliances and their repairs today, and therefore the cost of repairs given by us is conditional.
So, if you nevertheless decide to carry out the repair yourself, then let's take a closer look at how to do it.
Preparing for repair
Do-it-yourself washing machine repair starts with the preparation of the necessary tools and spare parts. Remember, the further service life of the automatic machine depends on the quality of spare parts, for this reason, do not buy cheap analogs, give preference to original parts.
So, you will need:
- Hammer
- Open end wrenches of various sizes
- Pliers
- Metal pin
- Set of screwdrivers
- Silicone based sealant
- Water repellent grease or lithol
- Camera
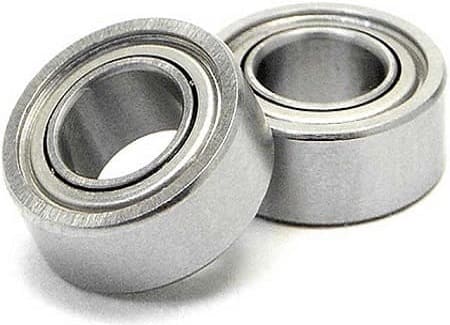
- 2 bearings
- Stuffing box
In order to be guaranteed to purchase exactly the bearing that you need, the old one must first be removed and an identical one must be selected with it. You may need a camera to make it easier for yourself to assemble a repaired car. Before you disassemble this or that site, take a picture of it and then you will know exactly how to assemble it after repair. Pay particular attention to the wiring connections when shooting.
Before replacing a bearing in a washing machine, make sure that normal lubrication will not fix the problem. It often happens that the washing machine begins to rattle from the thinning of the lubricant layer. How to lubricate a bearing in a washing machine? To lubricate this element, it must be freed from the protective caps with a scalpel. Remove the cover carefully. Lubricate the part with a special waterproof lubricant for washing machines. Next, take a new oil seal, also lubricate it and install it. Close the cover. If after these actions the noise is not eliminated, it is necessary to replace the bearing.
![]() See also - How and what to lubricate the oil seal of the washing machine
See also - How and what to lubricate the oil seal of the washing machine
Stage one - disassembling the washing machine
First you need to remove the cover of the device.This is easy enough. Unscrew the two screws on the rear side panel of the cover and simply lift it up by sliding it back a little.
Next, you need to pull out the washing powder tray. Pull the tray towards you and press the release latch while pulling the powder container towards you. These actions should free the tray and it will easily come out of the grooves. In some models, this button is absent, then you just need to pull the tray, slightly pressing it down.

To remove the upper dashboard, you must carefully inspect it. Determine where in your model the bolts for this panel are located, and remove them all. If after that the panel does not come off easily, then you missed one or more bolts. After the panel cover is unscrewed and easily comes out, disconnect all wires from the sockets and completely remove the element. Remember to photograph all parts during the disassembly process. Next, we move on to removing the bottom panel. The process should be straightforward. Using a flathead screwdriver, press the tabs that hold the bar in place and it will easily release.
![]() See also - Do-it-yourself cuff replacement on a washing machine
See also - Do-it-yourself cuff replacement on a washing machine
Stage two - remove the hatch cuff
The cuff is a special rubber gasket that connects the hatch opening and the laundry drum. It is fastened very simply with a spring and a clamp. To release the cuff and gain access to the removal of the entire front panel, you need to find a clamp. It can be detected visually. To remove it, using a flat screwdriver, pry on the spring and pull out the clamp. Then, carefully detach the cuff from the opening of the hatch and place it in the drum. Now the part we need is completely free, you can start dismantling it.
Stage three - remove the front panel
Having clicked the door of the washing machine, you need to unscrew the bolts that hold the panel. After that, you must carefully remove it from the hook. Don't pull too hard. The panel is wired to the hatch lock. Don't damage it. As soon as you were able to push this part towards you, disconnect the wire, only then you can fully remove the front wall and free access to the rest of the device.

Stage four - remove the tank
First you need to get rid of the inner top panel. First of all, you need to inspect the back of the machine and find the screws that secure the water supply valve. Having unscrewed these fasteners, you can begin to twist the bolts on the panel. Do not rush to remove it, because you still need to carefully disconnect all the wires and pipes. When everything is disconnected, you can remove the panel itself.
Next, we move on to disconnecting the drain pipe. It is connected to the washing machine tank using a clamp. We unscrew the clamp and disconnect the drain pipe.
After that, we proceed to disconnect the heating element. In different models, it can be located in the front or behind the structure. If your tubular electric heater (TEN) is in the back, you will need to remove the back wall. Carefully disconnect all connections to the heating element. Do not forget to photograph the original state before that. At this point, the wiring must be completely disconnected. Please note that in some places it can be fixed to parts of the machine using different fasteners. Having disconnected all the wires, we take them out.

Getting rid of counterweights. This must be done so that the tank is not too heavy. Unscrew them carefully. Then we disconnect the water level sensor. Shock absorbers can be detached. Armed with a wrench, unscrew the bolts holding these parts. For these jobs, it is best to use an extension piece.
Keep in mind that the tank itself is lightweight, so you do not need to make any special efforts to remove it. Put one hand into the tank and lift it up. With the other hand, release the container from the springs on which it is attached. After that, you can pull it out.
The final step is to remove the belt, unscrew the engine and shock absorbers. When completely empty, the reservoir can be disassembled to replace the bearing.
Stage five - disassemble the tank
After the tank is emptied, you may notice that it has two halves. These halves are fastened together along the entire perimeter of the joint. The fasteners depend on the make and model of the washing machine, they can be bolts or special latches. You need to separate the halves. We act depending on the type of fasteners. Removing the front end can often see debris and dirty deposits. It is advisable to get rid of dirt before assembly. On the back half, you will see a drum. It is he who is our goal.
This stage is the most responsible and requires increased attention and caution. We need to carefully detach the drum. First of all, remove the pulley. Simply unscrew the fasteners holding this part and remove the pulley from the axle. After removing the pulley, screw the unscrewed bolt back. At the same time, we spare no effort so as not to spoil the shaft during further work.

We take the hammer. There is no need to be zealous at this stage, proceed with caution. We are trying to gradually knock out the shaft. If these manipulations are in vain and the shaft remains in place, it is better to replace the bolt in order to avoid damage to it. We continue to knock. As soon as the shaft is level with the top of the bolt, we remove the bolt, and we take out the drum.
We proceed to visual inspection of the sleeve and shaft. Often, in case of untimely repairs, these parts can wear out so much that it is necessary to replace the cross. In order to assess the condition of the shaft, it should be wiped with a dry, clean cloth. After that, carefully examine it from all sides for the presence of development. To be completely sure of the integrity of the shaft, put a new bearing on it and determine if there is any play. If you still notice a flaw, without hesitation, change the shaft with a cross.
Next, inspect the bushing. It is located on the shaft and is designed to put on the stuffing box. The bushing should also not show signs of strong wear and mechanical damage. If you find strongly pronounced transverse grooves, such a part will no longer be able to fulfill its functions. An oil seal put on such a bushing will not be able to protect the bearing from water, and repair will need to be done again.
Stage six - bearing replacement
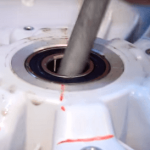
To remove the bearings, you need to remove the oil seal. It is pulled out very simply. Using a flat screwdriver, pry up on the oil seal and remove it. Next, we take a metal pin in our hands. With its help, we will knock out these elements. Putting the pin to the bearing, hit it with a hammer. Then we hit the opposite, the blows should be in the form of a cross, on the four sides of the spare part. With this simple trick, you can knock out both bearings.
With these manipulations, keep in mind that the smaller bearing must be knocked out from the inside, and the larger one outside the tank. Also, when performing these works, be extremely careful not to damage the product. It is best to knock out by resting the part on one knee.
At the end of this step, pay attention to the back wall and the places where the bearings sit. These places should be free of dirt or debris. They should not only be cleaned, they should be polished to a shine. Only in this case you will not have to repair the car again for a long time.

Well, now it's time to unpack the new bearings. We take the one that is smaller and hammer it in place of the removed one. We also apply the metal pin to the opposite sides, and hammer it in with light hammer blows. In order to determine whether an element has sat down in its place, carefully listen to the sound with the next blow. When the part fits properly, the sound will be more sonorous.
We carry out a similar operation to change the large bearing. Next, we move on to installing a new oil seal. It must be treated with lubricant, only after that the oil seal can be put in place.Experts advise using special lubricants designed for washing machines. However, such lubricants are not always available commercially. If you have not found a lubricant, you can use lithol grade 24. This material is freely sold in car stores.
Stage seven - final
Now you can be congratulated, the main part of the work is completed. You have replaced the necessary element, it's time to put everything back into place. The first step is to lubricate and reinstall the bushing. Next, we connect the halves of the container. To ensure that the tank does not lose its tightness after assembly, it is better to change the O-ring. If you do not have one, treat the mating edges with silicone sealant and connect the container.
Further, following the photographs or just instructions, we assemble the washing machine in the reverse order.
For many of us today, a washing machine is an integral part of housekeeping. The machine does a significant part of the work for us, giving us comfort and extra minutes of rest. However, in order to prevent your machine from breaking down at the most inopportune moment, it is recommended to carry out timely regular service. This will guarantee a long and trouble-free operation of your machine.
See also:
- 10 best Hotpoint-Ariston washing machines according to customer reviews
- 10 best Electrolux washing machines according to customer reviews
- 10 best ATLANT washing machines according to customer reviews
- 10 best built-in washing machines
- 10 best washing machines under 15,000 rubles according to customer reviews